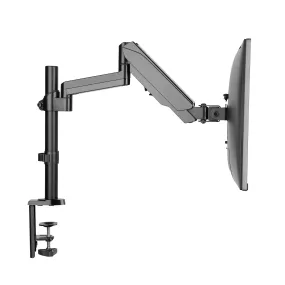
The Logitech Mounting Bracket for Tap Scheduler in Graphite is an essential accessory for any modern meeting room. This expertly designed bracket not only enhances the functionality of your Logitech Tap Scheduler but also adds a sleek, professional touch to your workspace. With easy installation and robust construction, it provides a reliable solution for securely displaying your scheduling device, allowing for an efficient and organized meeting environment.
- Effortless Installation: The Logitech Mounting Bracket offers a simple setup process, enabling you to mount your Tap Scheduler quickly and without the need for specialized tools.
- Sturdy Construction: Crafted from high-quality, durable materials, this mounting bracket ensures long-lasting stability for your Tap Scheduler, reducing the risk of damage during use.
- Modern Aesthetic: Featuring a stylish graphite finish, the bracket seamlessly integrates with various office decor, adding an elegant touch to your conference room.
- Optimized for Functionality: The bracket is designed to position your Tap Scheduler at an ideal height, ensuring easy access for all users and enhancing interaction with meeting room technology.
- Versatile Compatibility: Specifically crafted for the Logitech Tap Scheduler, this mounting bracket guarantees a perfect fit and reliable performance in any conference room setup.
Technical Details of Product
- Product Name: Logitech Mounting Bracket for Tap Scheduler
- Color: Graphite
- Material: High-quality durable materials
- Compatibility: Designed specifically for Logitech Tap Scheduler
- Installation Type: Wall or display mount
How to Install
Installing the Logitech Mounting Bracket for Tap Scheduler is a straightforward process. Just follow these simple steps:
- Gather the necessary tools: You will need a drill, a screwdriver, and a level for accurate installation.
- Determine the desired height for your Tap Scheduler, ensuring it is easily accessible to all users.
- Using the provided template, mark the spots where you will need to drill holes for the mounting screws.
- Drill the holes and insert the provided anchors (if necessary). Make sure they are secure.
- Align the mounting bracket with the holes and securely fasten it using the screws provided.
- Attach your Logitech Tap Scheduler to the mounted bracket, ensuring it is firmly in place.
- Double-check the installation with a level to ensure everything is positioned correctly.
Frequently Asked Questions
- Is the Logitech Mounting Bracket compatible with other devices? No, this mounting bracket is specifically designed to fit the Logitech Tap Scheduler, ensuring optimal performance and stability.
- What tools do I need for installation? You will need a drill, a screwdriver, and a level for accurate setup. All necessary mounting hardware is included with the bracket.
- Can I use this bracket outdoors? This mounting bracket is designed for indoor use only, as outdoor conditions may compromise its durability and the performance of the Tap Scheduler.
- Does the bracket support cable management? While this bracket primarily focuses on securely mounting the Tap Scheduler, users can utilize existing cable management solutions in their meeting rooms to keep cables organized and hidden.
- What is the warranty period for the Logitech Mounting Bracket? The product typically comes with a limited warranty, but please check the manufacturer's website or product packaging for specific warranty details.

 Cart(
Cart(


